Pin
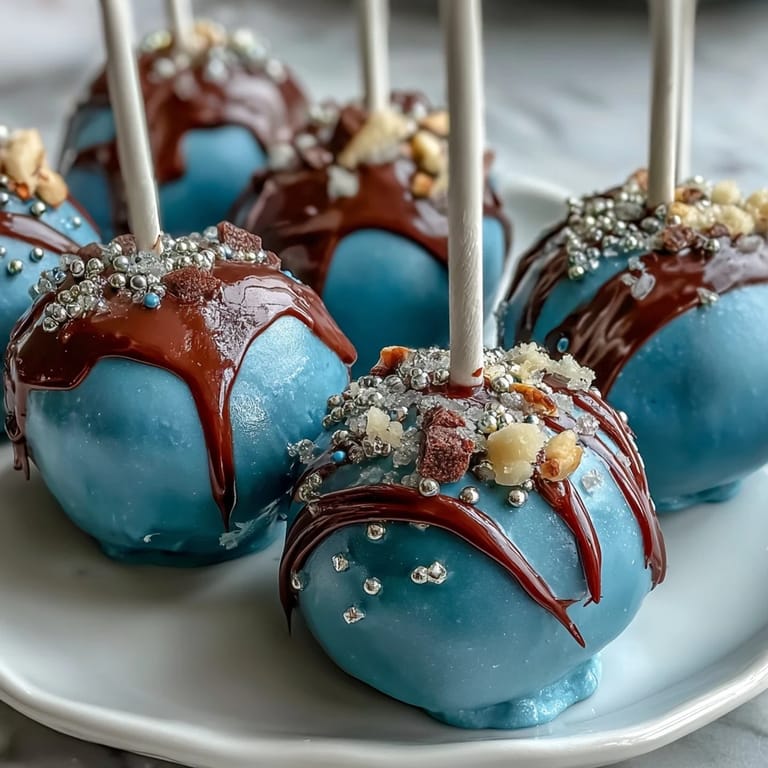
Pin My friend texted me three weeks before graduation asking if I could make something special for the celebration—something that screamed school spirit without being over the top. I was standing in the baking aisle when it hit me: cake pops in maroon and gold, because those colors had been stitched into every banner and sweatshirt for the past four years. That afternoon, my kitchen smelled like vanilla cake and melting chocolate, and I realized I was making tiny edible memories.
I still remember my mom walking into the kitchen while I was rolling the cake balls and asking why they were so perfectly round. She grabbed one before the refrigerator could set them and bit into the coating—chocolate exploded everywhere, and we both laughed so hard we cried. That's when I knew these weren't just desserts; they were moments of joy wrapped in candy melts.
Ingredients
- 1 box vanilla or chocolate cake mix plus ingredients listed on package: This is your foundation, and honestly, there's no shame in using a mix—it gives you consistent, tender crumb every time, leaving room to focus on the frosting and decoration magic.
- 1/2 cup unsalted butter, softened: Room temperature butter is non-negotiable here; cold butter will fight you during mixing and create lumps that no amount of beating can smooth out.
- 1 1/2 cups powdered sugar: Sift it first if you have time—it makes the frosting noticeably creamier and prevents grainy texture.
- 1 tablespoon milk: This is your texture fixer; add it slowly and watch the frosting transform from stiff to cloud-like.
- 1 teaspoon vanilla extract: Use real vanilla if you can; it makes the frosting taste like a memory.
- Pinch of salt: This tiny addition cuts through the sweetness and makes everything taste more sophisticated.
- 450 g candy melts in two school colors: Buy the good quality ones if possible—they melt smoother and coat more evenly than cheaper brands.
- 2 tablespoons vegetable shortening or coconut oil: This optional addition is the secret that separates thick, clumpy coatings from silky professional finishes.
- Gold sprinkles or edible gold glitter: Apply these while the coating is wet, or they'll slide right off into sad piles on your counter.
- 24 lollipop sticks: Don't skimp on stick quality; flimsy ones bend when you're dipping.
- Styrofoam block: This is your drying station; poke the sticks in while the coating sets so they dry upright and look polished.
Tired of Takeout? 🥡
Get 10 meals you can make faster than delivery arrives. Seriously.
One email. No spam. Unsubscribe anytime.
Instructions
- Bake the Cake:
- Follow your cake mix package to the letter—overmixing is the enemy here. Let the cooled cake rest on the counter while you prep everything else; rushing this step leads to warm crumbs that won't hold together later.
- Make the Frosting:
- Beat the softened butter alone first until it's pale and fluffy, which takes about two minutes of consistent beating. Add the powdered sugar gradually so you don't create a powdered sugar cloud that covers your entire kitchen (learn from my mess).
- Form the Cake Balls:
- Crumble the cake into fine pieces before mixing with frosting—large chunks refuse to bind properly. The mixture should feel like damp sand that just barely holds its shape when squeezed; too wet and they'll slide off the sticks, too dry and they crack.
- Shape and Chill:
- Use a cookie scoop or tablespoon to keep sizes consistent, because uneven pops look awkward in the final presentation. That refrigerator time isn't optional; cold cake balls dip into coating without absorbing it like sponges, which means a thin, elegant shell instead of a thick candy shell that drowns the cake flavor.
- Insert Sticks:
- Melt just enough candy for dipping the stick ends—this creates an edible glue that anchors them solidly. Push the stick only halfway in; going too deep wastes space and sometimes cracks the ball.
- Coat with Candy Melts:
- If your melted candy feels thick and sluggish, stir in a teaspoon of that shortening and watch it transform into liquid silk. Dip with a gentle swirl, tap the stick against the bowl's edge to release excess, then place immediately into the waiting Styrofoam.
- Decorate:
- The frosting-to-coating transition happens in seconds, so have your sprinkles ready and your hand steady. This is where the magic happens, where they stop being cake balls and become celebration.
- Set and Serve:
- Patience now pays off; rushing to eat them before the coating hardens leaves sticky chocolate all over your fingers. A fully set pop has a satisfying snap when you bite through the shell.
 Pin
Pin Three days later, I delivered a box of these to the graduation party, and watching people's faces when they bit into that first pop—that combination of soft cake, creamy frosting, and snappy chocolate shell—reminded me why I love cooking. Those pops weren't just dessert; they were tiny celebrations of four years coming to an end and everything that comes next.
The Texture Secret Nobody Talks About
The magic happens in those three layers: the tender crumb with frosting creates a soft, creamy center that should taste like actual cake, not a dry hockey puck held together by icing. When you coat it in candy melts, you want that shell to shatter cleanly between your teeth, not stick to your molars like chewing gum. The shortening or coconut oil isn't just a texture thing—it's the difference between a coating that's plastic-like and one that feels sophisticated.
Timing and Temperature Matter More Than You Think
I learned this the hard way after making a batch where I forgot to chill the cake mixture properly; half of them slipped off their sticks mid-dip, and I spent twenty minutes fishing cake balls out of melted chocolate. Every temperature checkpoint in this recipe exists because someone before you already made that mistake. Your refrigerator is your best friend here—that hour of chilling isn't wasted time, it's insurance against frustration.
Making Them Look Intentional and Celebratory
School colors are your shortcut to making these feel personal and special without needing artistic skill. The gold sprinkles add shine and sophistication that transforms basic cake pops into something that belongs at a fancy event. If you want to take it further, tie tiny ribbons around each stick in your school colors, or even add a small tag with the year or a name.
- Apply sprinkles while the candy coating is still wet, or they'll slide around like loose marbles.
- Let them set completely before packaging or stacking, or the coating will smudge and stick together.
- Store them in a cool, dry place away from direct sunlight to keep the colors bright and vibrant.
 Pin
Pin These cake pops have a way of bringing people together, one bite at a time. Make them with intention, and they'll be remembered long after the celebration ends.
Recipe Questions
- → How do I ensure cake pops hold together well?
Mix the crumbled cake with just enough frosting to create a firm yet moist mixture that holds shape without being wet.
- → Can I use different cake flavors for these pops?
Yes, vanilla or chocolate cake mixes work well, and you can choose flavors that suit your taste preference.
- → What helps candy melts coat smoothly?
Adding vegetable shortening or coconut oil to melted candy melts results in a smoother, shinier coating easier to work with.
- → How long should the cake balls chill before dipping?
Chilling for at least one hour in the refrigerator or 30 minutes in the freezer firms the cake balls for easier handling.
- → How do I keep cake pops fresh after making them?
Store in an airtight container at room temperature for up to 3 days, or in the refrigerator for up to one week.